Etraffic Webexpert
Display variant images on change of variant
First of all let us talk about what is the product variant?
A specific item that is bundled in with related variants to form one distinguishable product is known as a product variant.
Suppose you have a product For eg T-shirt and t-shirt has basically two options named color and size. And each option has values like color has three values blue, red, and orange. And size has three values: small, medium and large. Then these are the variants of the product. One specific variant from these options is a medium, blue T-shirt. Basically options of a product which has values will be considered as variants of products.
Product variants can have their unique identifiers, such as price, and every variant is based on the same product definition.
Task:
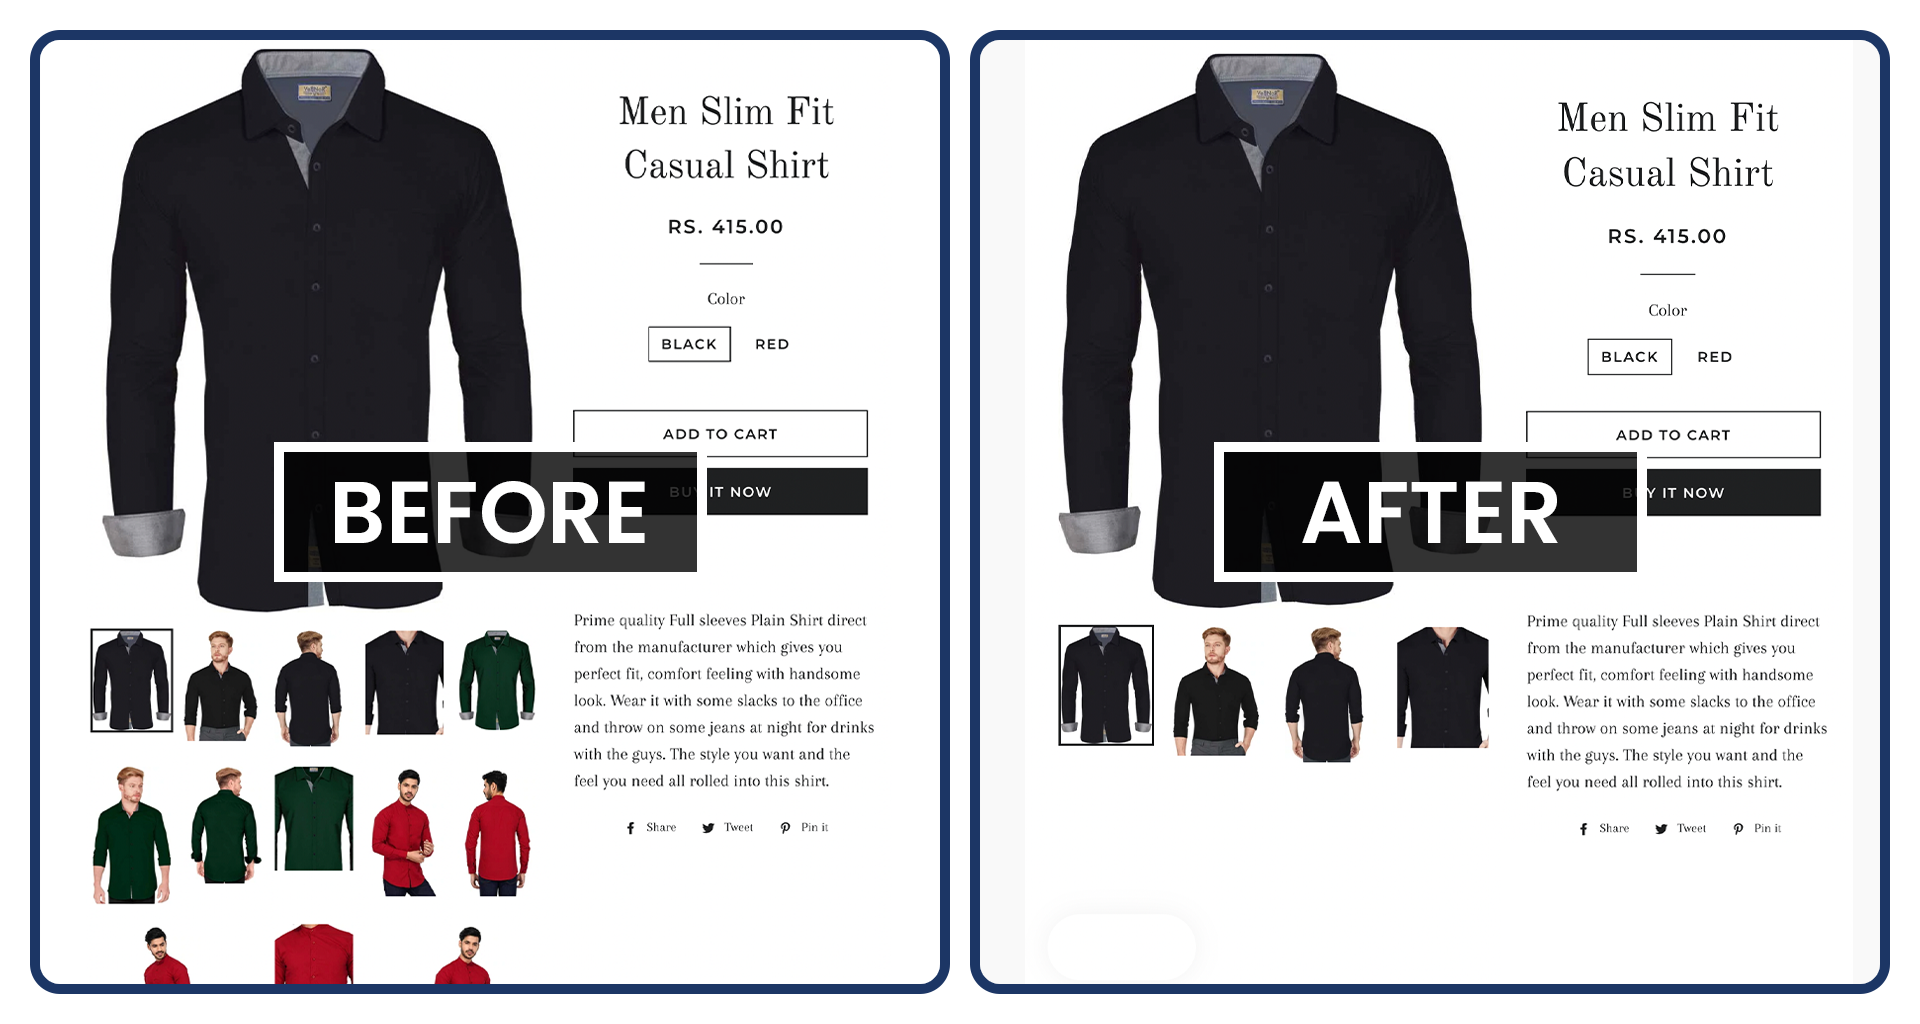
When you click on the variant of the option then the product image will change accordingly and in thumbnails the images will show accordingly to the chosen option. You have seen many sites with this functionality. Are you wondering how to accomplish this functionality?
See Below Example


There are two ways to achieve this:
Use App:
You can use an app for achieving this i.e. " Variant image Automator app " . This will help you to show the variant image on the click of variant. You can use this app if it fulfils your requirement 100%. Sometimes it will not work for all the themes and that is the reason why you need to Hire a Shopify developer.
How to accomplish this without using any app?
For achieving this with the custom code you need to Hire a Shopify developer who can help you to do this task with the manual code which will work for all the Shopify themes.
We can use this method according to the themes as if any theme has any complexity we can easily modify our code according to the theme. We can use this method on the latest theme also for eg: Dawn theme, prestige theme, impulse theme etc. Basically we have done flexible code according to the client’s requirement. This will be the easiest method for those who want their sites to have more features. And nowadays, this is a very common feature. You can see lots of sites having this feature. Our recommendation will be to always try different methods and functionality to make your site a way different from others.
We have done many searches for this and after a lot of searching we conclude to a point where we find the accurate code for this and we achieve this through metafield.
Steps included in this to accomplish this:
1. To achieve this we organized the product media respective to the variants.

2. After I went in shopify Settings -> Metafield -> Create a Variant Metafield Definition.


3. A form will open fill it with the given values as given in screenshot


4. Now this metafield input will be available at the bottom of product variant editor page


5. Now Enter the image positions separated by comma (,) in the input field

Now open the theme editor

 1. In your product-template.liquid file find the option dropdown html and its code with this
Before:
<select name="id" id="ProductSelect--{{ section.id }}" class="product-single__variants no-js"> {% for variant in product.variants %} {% if variant.available %} <option {% if variant == product.selected_or_first_available_variant %} selected="selected" {% endif %} data-sku="{{ variant.sku }}" value="{{ variant.id }}"> {{ variant.title }} - {{ variant.price | money_with_currency }} </option> {% else %} <option disabled="disabled"> {{ variant.title }} - {{ 'products.product.sold_out' | t }} </option> {% endif %} {% endfor %} </select>
<select name="id" id="ProductSelect--{{ section.id }}" class="product-single__variants no-js"> {% for variant in product.variants %} {% if variant.available %} <option {% if variant.metafields.variant.image_position != blank %}data-image-positions="{{variant.metafields.variant.image_position}}"{% endif %} {% if variant == product.selected_or_first_available_variant %} selected="selected" {% endif %} data-sku="{{ variant.sku }}" value="{{ variant.id }}"> {{ variant.title }} - {{ variant.price | money_with_currency }} </option> {% else %} <option disabled="disabled"> {{ variant.title }} - {{ 'products.product.sold_out' | t }} </option> {% endif %} {% endfor %} </select>
Now Give the thumbnails their position using the {{forloop.index}}

After that go to your theme.js file and find the variant change function there.
And put the code to display the images of the currently selected variant by putting the given code
var imagePositions = $('#ProductSelect--product-template option[value="'+variant.id+'"]').data('image-positions'); var imagePositionsArr = imagePositions.split(','); $('.product-single__thumbnails li').hide(); $.each(imagePositionsArr, function(index, position) { $('.product-single__thumbnails li[data-image-position="'+position+'"]').show(); });
Now let's hide images on page and show only image of currently selected variant only


Get back to the product-template.liquid and goto the thumbnails loop,
{% assign currentVariant = product.selected_or_first_available_variant %} {% assign imagePositions = currentVariant.metafields.variant.image_position %} and put this code in the thumbnail wrapper element % unless setpos %}style="display: none;"{% endunless %}
Final Output